Gifts For Bride & Groom
FAITH JEWELRY
Valentine's Day
Father's Day
.......................
Memorial | Remembrance | Miscarriage
MEN RELATIVES
SHOP BY FEATURE
SHOP BY PRICE
Image caption appears here
. . . . . . . . . . .
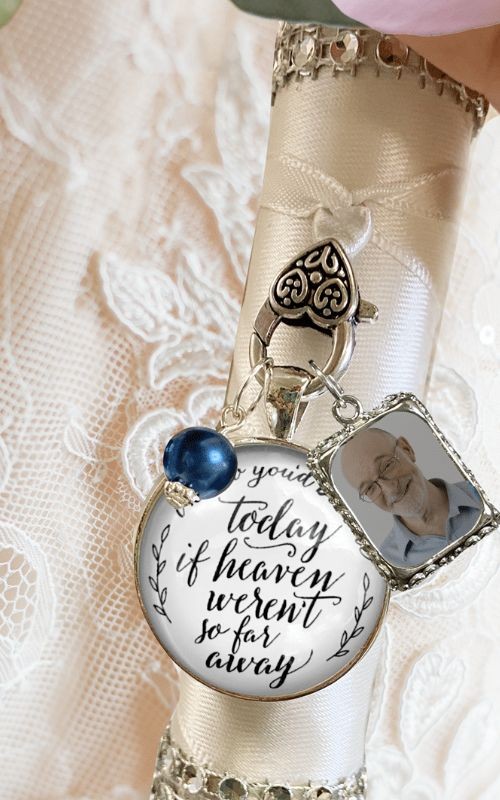
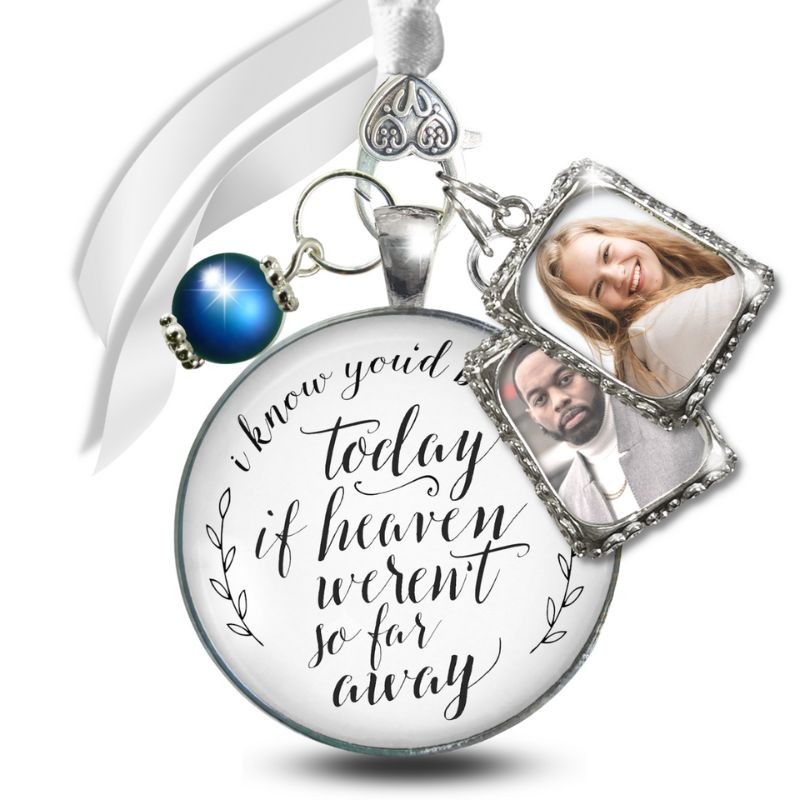
A wedding day often evokes a mix of emotions for brides, as they embark on a new life journey while simultaneously missing the presence of a dear one who has passed away. To alleviate this sense of loss and keep cherished memories close at hand, an increasing number of brides are opting for wedding bouquet photo charms. These elegant accessories allow brides to honor their loved ones by attaching a photo to their bouquet on their special day.
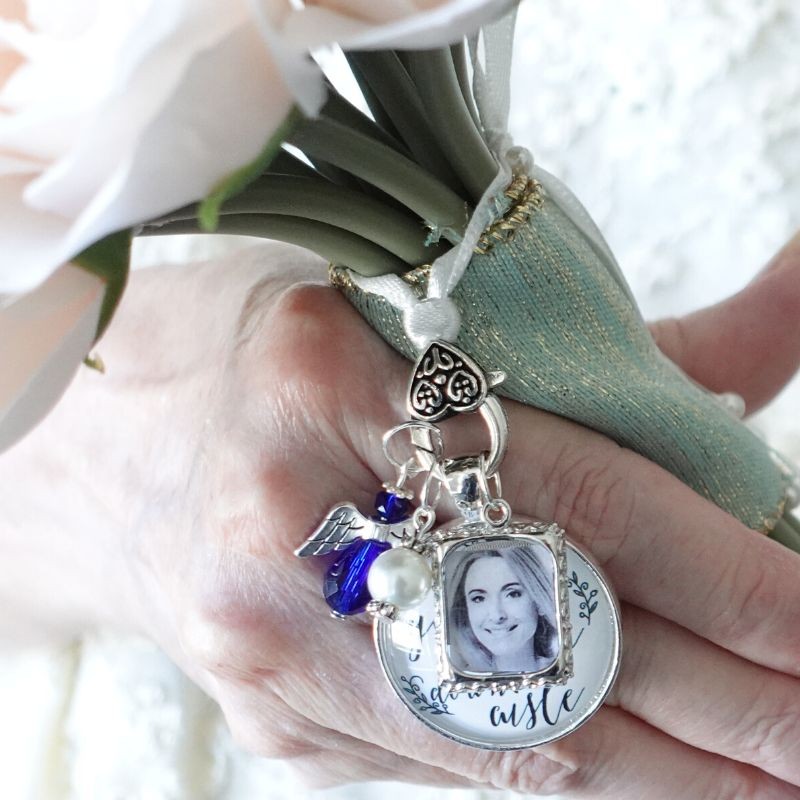
Bouquet charms hold great sentimental value and serve as a comforting presence during the wedding ceremony. For instance, a bride may attach a photo of her late grandmother, feeling her presence and support throughout the day.
Likewise, brides can include photos of close friends or family members unable to attend due to travel restrictions or other circumstances, symbolizing their spiritual presence. [At Gutsy Goodness, we also offer non-memorialdestination wedding charm options.]
With the growing popularity of wedding bouquet photo charms, they have come to be seen as amust-have accessory for many brides. In this blog, we will guide you through how to make a wedding bouquet with a picture charm while discussing the pros and cons of this DIY endeavor.
A wedding bouquet photo charm offers a touch of solace and warmth on your special day, paying tribute to those who may be absent but still hold a special place in the hearts of the bride and groom.
To create a wedding bouquet photo charm, you'll need a few key materials. These include:
A photo of your loved one(s) to attach to the charm
Round metal bezel or pendant frame
Glass cabochon to cover photo
Clear casting resin: $10-$25 for a small kit
Small paintbrush for applying the resin or glue
Specific glue
Photo Paper
Drill, punch or pliers
Jump ring or other small ring (box)
Ribbon (roll)
The cost of these materials can add up quickly, with the resin alone costing upwards of $20 for a small kit. And unfortunately you have to buy multiples of many items, including jewelry rings, ribbon, glass cabochons and bezel trays.
PRICE COMPARISON BETWEEN DIY & Gutsy Goodness Bouquet Charms with Photo Service
When you head to your local craft store, ask for specific help from a clerk toexplain that you will be using (ink/laser jet/photo ink) to get their recommendations on glue that will not react with the ink and paper.
While making your own wedding bouquet photo charm can be a rewarding DIY project, it's important toconsider the investment involved before diving in. If you're short on time or don't want to deal with the expense, consider our pre-made charms from Gutsy Goodness, which are reasonably priced and we also have a photo service available.
If you're up for the challenge, here's a guide to creating your own charm.
How to make a wedding bouquet with a picture charm: Things to know before beginning
Creating a wedding bouquet photo charm can be a challenge due to the various variables involved. It's not just about the gluing process, but also the type of paper, ink, glue, and metal used.
Each of these elements can have a different reaction, and it's difficult to know the outcome until the charm has dried completely. To avoid any smudging, blurriness, air bubbles, or sparkles, it's recommended to let the charm sit for at least 72 hours, and preferably 5-7 days, before presenting it as a gift to the bride.
Start by searching through your photos to select the one you'd like to attach to your charm. It's essential to choose a high-quality image to ensure that your charm looks beautiful and lasts for years to come.
If your photo is not of high quality, it's recommended to edit it using photo editing software. You can find some great DIY tips atSizeMyPhoto.com. Gutsy Goodness also offers a photo service that can help you edit and improve the quality of your photo.
Once you have your high-quality photo, you can print it out and cut it to the size of your charm. You can also use a photo of a photo, but be sure to avoid any reflections or glare.
Frame only
Frame and glass pendant quote like "Missing you as I walk down the aisle"
Metal Bezel tray and glass cabochon
A resin charm
Choosing a resin-made memory charm? This typically involves mixing two parts resin with one part hardener. Using a small paintbrush or toothpick, apply a thin layer of resin to the inside of the bezel or frame.
Choosing a glass bezel memory charm? first trim your photo and then carefully clean your glass bezel. To decrease the chance of air bubbles or other smearing, wipe your glass bezel with an alcohol wipe before gluing and allow it to air dry.
Now that you know the size needed for your charm, based on the decision above, if the editing and cropping for the correct size are complete, it's ready to get a hard copy. Depending on which kind of charm you chose above will determine how it can be printed.
You can load it to a local photo printer's website and go pick it up, like Walmart or Walgreen's.
You may also be able to print it on your printer. Make sure your ink cartridges have plenty of ink. Print copies on photo paper and regular white paper and then start your experiments.
Whichever you decide, have plenty of extra copies to be able to try samples or correct mishaps in the drying process.
Glues and resin react differently to different kinds of ink, so this step is a lot of trial and error. You may have
A photo from a professional photo center
A photo printed on photo paper with your ink jetprinter
A photo printed on photo paper with your laser jetprinter
A photo printed on good quality regular white paper with your ink jet printer
A photo printed on good quality regular white paper with your laser printer
Each one of these may give a different kind of result depending on what glue you purchased, what metal you are attaching it to. We recommend before possibly wasting a resin creation or a glass cabochon, first try a sample.
Add a bit of glue to an extra photo and allowing it to sit overnight to see if there is any reaction to the ink.
We recommend letting the charm sit for at least 72 hoursto ensure the photo doesn't fade or smear under the glass.
Additionally, the glue can also react with the metal tray after 72 hours, so it's best to keep the charm for 5-7 days before giving it to the bride.
When considering how to make a bridal bouquet charm it's usually considered a 2-hour project, but with the shopping, testing, gluing and waiting, plenty of time should be planned for the process so the charm looks just as you expected when she opens the gift on her special day.
How to apply the resin to the bezel charm
Mix the clear casting resin according to the instructions on the package. Using a small paintbrush or toothpick, apply a thin layer of resin to the inside of the bezel or frame. Be sure to cover the entire surface, including the sides.
Carefully place your photo onto the resin, making sure it's centered and straight. Apply another layer of resin on top of the photo, making sure to cover the entire surface and edges. Use a toothpick or small brush to remove any air bubbles.
How to apply the glue to the bezel charm
Next, using a small amount of glue, carefully attach the photo to the bottom of the bezel. Make sure it's centered and straight. Allow it to dry at least a few hours, preferably overnight, to ensure there is no moisture before covering it with the glass.
The next day, place the glass cabochon on top of the photo, making sure it fits securely in the bezel. Use a small amount of glue to attach the cabochon to the bezel. Be careful not to use too much glue, as it can seep out from the edges and ruin the charm.
Youmay notice a cloudy appearance which is normal while glue is setting, however, depending on your ink and your glue, it may get worse, not better. Keep an eye on it. Allow the glue to dry completely, according to the package instructions.
While this method can be a bit simpler than using resin, it's important to take extra care in choosing the right glue to avoid any unwanted reactions with the photo paper or ink.If you're unsure or uncomfortable with this method, consider purchasing a pre-made charm from Gutsy Goodness, which are crafted with care and ready to attach to your bouquet.
Whatever method you have chosen, if glue or resin is involved, allow it to cure. Although it can typically takes several hours or overnight,we've found that up to 5 days later the metal can start to react to the glue and ink and cause a mess, so start this process with plenty of time to start over before a wedding date if necessary.
Once the resin or glue is fully cured, put the jump ring into the hole. If you've done a resin charm, you may need to use a drill first to create a small hole in the bezel.
In order to have options about how to attach the charm to the bouquet we recommend threading a 10-inch piece of ribbon through it.
While the steps themselves are fairly straightforward about how to make a wedding bouquet with a picture charm, it's important to note that creating a wedding bouquet photo charm can be atime-consuming and intricate process.
If you're short on time or don't want to deal with the hassle, consider purchasing apre-made charm from Gutsy Goodness, which are carefully crafted and ready to attach to your bouquet.
Making your own wedding bouquet photo charm or one as a gift can be a doable DIY project, and there are kits available that make it look simple. However, most of the materials are often missing in these kits, and there are few instructions.
Since there are so many variable with glues and inks, these companies are reluctant to include step-by-step instructions because you would feel overwhelmed, so they just let you figure it out and hope for the best.
Creating a wedding bouquet photo charm can be a meaningful DIY project, but it can also be a time-consuming and intricate process. Moreover, if you choose to glue the photo to a glass cabochon, you must be cautious with the glue you use as it can smear the photo. You don't want to leave this keepsake to chance as it is a significant part of your special day.
A wedding bouquet photo charm brings comfort to a bittersweet moment on the wedding day and serves as a beautiful keepsake that can be treasured for years to come. Moreover, photographers often take pictures of the bride's bouquet, the rings, and other photos with the charm, so it is important to ensure it looks top-notch.
To considering how to make a wedding bouquet with a picture charm the materials, tools and time needed can add up quickly.
At Gutsy Goodness, we offer wedding bouquet photo charms and you can even personalize it with our Build a Bouquet Charm tool that provide a convenient, affordable, and customized alternative to creating your own. While creating your own DIY charm can be a rewarding experience, it can also be a time-consuming, costly, and frustrating project. Our memorial bouquet charms are professionally crafted with high-quality materials, ensuring that they will last for years to come-without the hassle, mess or stress.
Brides also revive their handmade charms in numerous ways to display and cherish them. They can be kept in a shadow box, as a rearview mirror guardian-angel type charm, as a charm that attaches to the wedding photo album, or in a wedding time capsule. This makes them a versatile and sentimental addition to any wedding.
Not only do our handmade quote pendant glass charms save you time and effort, but they also make a thoughtful and sentimental gift for any bride. Plus, you can rest assured that our charms are priced affordably without sacrificing quality.
By purchasing a done-for-you handmade wedding bouquet photo charm from Gutsy Goodness, you can ensure a stress-free and beautiful addition to the wedding day. They make a thoughtful and sentimental gift for any bride, and can be kept as a treasured keepsake for years to come.